In an exciting development that marks a significant milestone in the world of tech, Apple has recently announced the launch of over 600 new apps designed exclusively for its groundbreaking Apple Vision Pro. This announcement not only reflects Apple’s commitment to innovation but also opens up a new realm of possibilities for users of this innovative device. In this article, we will take an in-depth look at what Apple Vision Pro is, the variety of apps being offered and how they are set to revolutionize the user experience.
What is Apple Vision Pro?
Apple Vision Pro, the tech giant’s latest marvel, is a testament to Apple’s continued pursuit of innovation. The device integrates the most advanced technology to deliver a unique augmented reality (AR) experience, setting a new standard for personal computing.
The Impact of Apple Vision Pro on Tech and Lifestyle
The introduction of the Apple Vision Pro isn’t just a leap in technology; It is a change in the way we interact with the digital world. It is designed to integrate seamlessly into daily life, giving users a more immersive and intuitive way to work, play and learn.
Overview of the New Apps
Image Source: trustedreviews.com
With over 600 new apps built for the Apple Vision Pro, users are spoiled for choice. These apps cover a wide range of functionalities from productivity and gaming to health and fitness, each designed to take advantage of the unique capabilities of Apple Vision Pro.
Categories of Apps Available
The variety of apps available is a testament to the versatility of the Apple Vision Pro. Let’s explore some categories:
Productivity Apps:
These apps are designed to increase efficiency, offering new ways to manage tasks, meetings, and projects.
Gaming Apps:
Immerse yourself in a new dimension of gaming with apps that bring virtual worlds to life.
Health and Fitness Apps:
Stay on top of your health goals with apps that track progress, offer virtual workouts, and provide health tips.
Educational Apps:
Learning has never been more engaging with apps that provide interactive lessons and immersive educational experiences.
Highlighted Apps for Apple Vision Pro
Must-Try Apps for Enhanced Productivity
Among the plethora of apps, many are known for their ability to increase productivity. These apps provide innovative solutions for time management, organization, and collaboration, making them a must-have for any professional.
Gaming Apps to Look Out For
Apple Vision Pro’s gaming apps are set to redefine the gaming experience. With immersive AR capabilities, these games provide a level of interactivity and realism that was previously unimaginable.
Health and Fitness Apps
The health and fitness apps available for the Apple Vision Pro are designed to motivate and guide users to a healthy lifestyle. From tracking workouts to providing personalized health advice, these apps are your new fitness companions.
How These Apps Change the Game
Enhancing User Experience
The apps developed for Apple Vision Pro aren’t just applications; They are experiences. They are designed to improve the way users interact with their devices, providing more intuitive, immersive and personalized ways to use technology.
Pushing the Boundaries of Innovation
The launch of these apps marks a new era of innovation. They utilize Apple Vision Pro’s advanced technology and inspire developers to think creatively about enhancing the user experience.
Apple’s announcement of over 600 new apps for Apple Vision Pro is an important step towards integrating technology into our daily lives. These apps promise to enhance productivity, entertainment, health, and learning, while providing users with a glimpse of the future of personal computing.
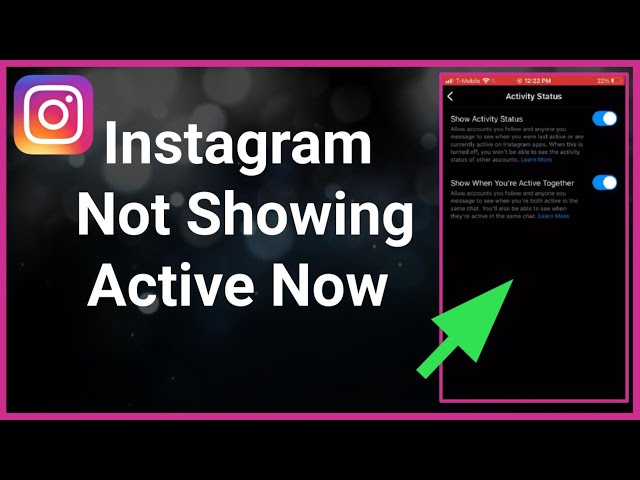
Instagram has become a ubiquitous part of our social lives, connecting us with friends, family, and even celebrities. One feature that is often overlooked but plays an important role in this social interaction is the “last active” state. This little information can help us understand when our friends are online or when they have recently checked the app. But what happens when this feature mysteriously disappears or doesn’t work as expected?
The Mystery of Missing Last Active
You’ve probably experienced this yourself – visiting a friend’s chat window only to find the last active status conspicuously absent. Before getting into the intricacies of why this happens, it’s important to understand the basics.
Understanding Instagram's Activity Status Feature
Activity status on Instagram shows when a user was last active on the app or when they are currently active. But it’s not just a simple to switch. Privacy concerns have led Instagram to provide settings that control who sees this information.
How to Turn On Activity Status
Turning on your activity status is straightforward.
Launch the Instagram app on your device.
Tap your profile icon in the bottom right.
Tap the menu (three lines) in the top right, then select ‘Settings’.
In the Settings menu, select ‘Privacy’.
Scroll down to ‘Activity Status’ under Privacy Settings.
Turn on the ‘Show activity status’ toggle (it will turn blue).
Reasons Why Last Active Might Not Show
If your activity status is on but you still can’t see the last active status of others, it may be because they have turned off their activity. Remember, this feature is reciprocal – if you hide your status, you can’t see others too.
The Impact of User Behavior
User behavior can also affect the visibility of Last Active. Irregular movement patterns may cause the position to appear incorrect or delayed.
In conclusion, Instagram’s Last Active feature is a useful tool for staying in touch, but it is subject to various factors such as privacy settings, technical issues, and user behavior. Understanding these can improve your Instagram experience while respecting the privacy of others.
FAQs
Can I see Last Active if someone has muted me?
No, muting affects the visibility of the Last Active status.
Does Last Active show for all followers?
Only when the activity status of both parties is On.
Is it possible to see Last Active without being friends?
No, you need to follow each other for this feature to work.
Can I hide my Last Active status from a specific user?
Instagram currently does not allow selectively hiding activity status.
Why is my Last Active status showing the wrong time?
This may be due to some disorder or irregular activity pattern.
Wireless mice offer convenience and freedom of movement, but like any technology, they can encounter issues. If you’re facing the frustration of a non-responsive wireless mouse on your Windows 11 PC, don’t worry – we’ve got you covered. In this guide, we’ll walk you through troubleshooting steps to get your wireless mouse back in action.
Why Is Your Wireless Mouse Not Working?
Understanding the possible causes of your wireless mouse issues is the first step toward finding a solution:
1. Battery Problems
Image Source: alphr.com
Battery problems often include rapid power depletion and poor contact points, leading to connectivity issues and inconsistent performance. Regularly checking and replacing batteries, and ensuring clean contact points, can resolve these common problems.
2. Connectivity Issues
Connectivity issues are commonly due to signal interference, weak batteries, or pairing glitches, leading to inconsistent cursor movements and response delays, necessitating troubleshooting for stable performance.
3. Driver Problems
Driver problems in wireless mice can cause unresponsiveness or erratic behavior, often due to outdated or corrupt software, requiring updates or reinstallation to ensure smooth and accurate cursor control.
4. Interference
Wireless mice may be affected by interference from other devices. Make sure there are no electronic devices nearby that could interfere with the signal.
5. Hardware Malfunction
If none of the above solutions work, it’s possible that your mouse has a hardware issue.
Step-by-Step Troubleshooting
Let’s address your wireless mouse issue with a step-by-step approach:
Check Batteries
Replace or recharge the batteries in your wireless mouse. Make sure they are inserted correctly.
Reconnect the Mouse
If your mouse has a USB receiver, unplug it and plug it back in. Make sure it is connected securely.
Restart Your PC
Restarting your PC can often resolve wireless mouse issues, as it refreshes system connections and resolves temporary software glitches that may be hindering mouse functionality.
Update Mouse Drivers
Updating mouse drivers is a key solution to fix issues with responsiveness and compatibility, ensuring smooth and efficient operation of your wireless mouse.
Test for Interference
Move any potential sources of interference away from your mouse and receiver.
Test with Another PC
To rule out hardware problems, test your wireless mouse on another computer. If it works there, the problem may be with your Windows 11 PC.
Check for Windows Updates
Make sure your Windows 11 operating system is up to date, as updates may include important fixes for hardware compatibility.
Conclusion
Your wireless mouse not working on Windows 11 can be frustrating, but most problems can be solved with a few simple troubleshooting steps. By checking the batteries, reconnecting the mouse, updating drivers, and addressing possible interference, you can probably get your mouse back to work.
1. Why is my wireless mouse cursor moving irregularly?
Irregular cursor movement may be caused by interference or a dirty sensor. Make sure to have a clean and neat surface for your mouse.
2. Can I use a wired mouse as a temporary solution?
Yes, connecting a wired mouse can work as a temporary solution while you troubleshoot your wireless mouse.
3. How often should I replace wireless mouse batteries?
The frequency of battery replacement depends on usage. On average, wireless mouse batteries can last from several months to a year.
4. What should I do if my wireless mouse still doesn’t work after troubleshooting?
If your mouse remains unresponsive, consider contacting the manufacturer’s customer support or seeking professional help.
5. Are there any software tools for diagnosing wireless mouse issues on Windows 11?
Yes, some software tools can help diagnose and fix mouse-related problems on Windows 11. Check your mouse manufacturer’s website for such tools or consult online forums for recommendations.
In the digital age, managing devices and peripherals like printers has become an essential part of our daily lives. However, there may come a time when you will need to remove a printer from your Windows 11 or Windows 10 PC. Whether you’re upgrading your printer, experiencing compatibility issues, or simply decluttering your device list, this guide will walk you through the steps to efficiently remove a printer from your Windows PC.
Why You Might Need to Remove a Printer
Before we get into the process, it’s important to understand why you want to remove the printer:
1. Upgrading or Replacing Your Printer
When you get a new printer or upgrade your existing printer, it is necessary to remove the old printer to avoid confusion and ensure proper installation of the new device.
2. Solving Compatibility Issues
If your printer isn’t working properly with your PC or if you’ve switched to a different model or brand, removing the old printer may resolve compatibility issues.
3. Decluttering Your Devices
Over time, your devices list may become cluttered with printers you no longer use. Deleting them can streamline your device management.
Step-by-Step Guide
Now, let’s move on to the process of removing a printer from your Windows 11 or Windows 10 PC:
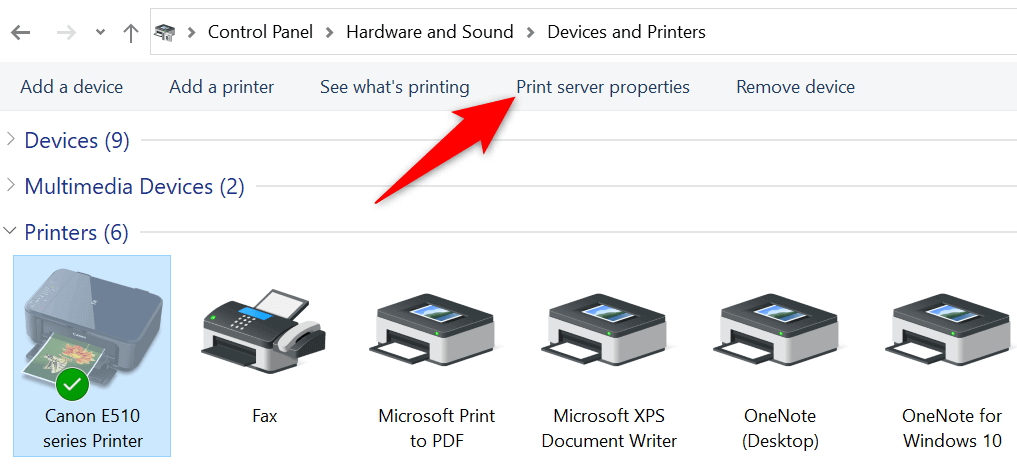
Click the “Start” menu and select “Settings”.
In the Settings window, click the “Device” option.
On the left sidebar, select “Printers & Scanners.”
In the Printers and Scanners section, you will see a list of connected printers. Find the one you want to remove.
Click on the printer you want to remove and a “Remove Device” button will appear. Click it.
A confirmation dialog will appear, asking if you are sure you want to delete the printer. Confirm by clicking “Yes”.
The selected printer will be removed from your PC, and you will see it disappear from the list of printers and scanners.
Conclusion
Removing a printer from your Windows 11 or Windows 10 PC is a straightforward process that can help you maintain an organized and efficient device list. Whether you’re upgrading your printer, dealing with compatibility issues, or simply decluttering, following these steps will ensure a hassle-free experience.
No, you will have to remove each printer individually by following the steps outlined in this guide.
2. Will removing a printer delete its drivers?
No, removing a printer will simply remove it from the list of connected devices on your PC. The printer drivers will remain intact unless you uninstall them separately.
3. Can I remove a printer if it’s offline?
Yes, you can remove the printer even when it is offline.
4. Is there a limit to how many printers I can connect to my Windows PC?
There is no strict limit to the number of printers you can connect, but it is recommended to keep your device list organized by removing printers you no longer use.
5. What should I do if I accidentally remove the wrong printer?
If you accidentally remove the wrong printer, you can easily reconnect it by following the printer setup process on your PC.
WhatsApp Web has become a staple in our digital communications, providing convenience and flexibility. However, with convenience also comes the need for security. In this comprehensive guide, we will learn how to password-protect WhatsApp Web.
Understanding WhatsApp Web
WhatsApp Web is the browser version of the popular messaging app, which allows users to send messages and files from their computers. Unlike mobile apps, it requires a constant connection to your phone.
The Importance of Securing WhatsApp Web
Image Source: digitaltrends.com
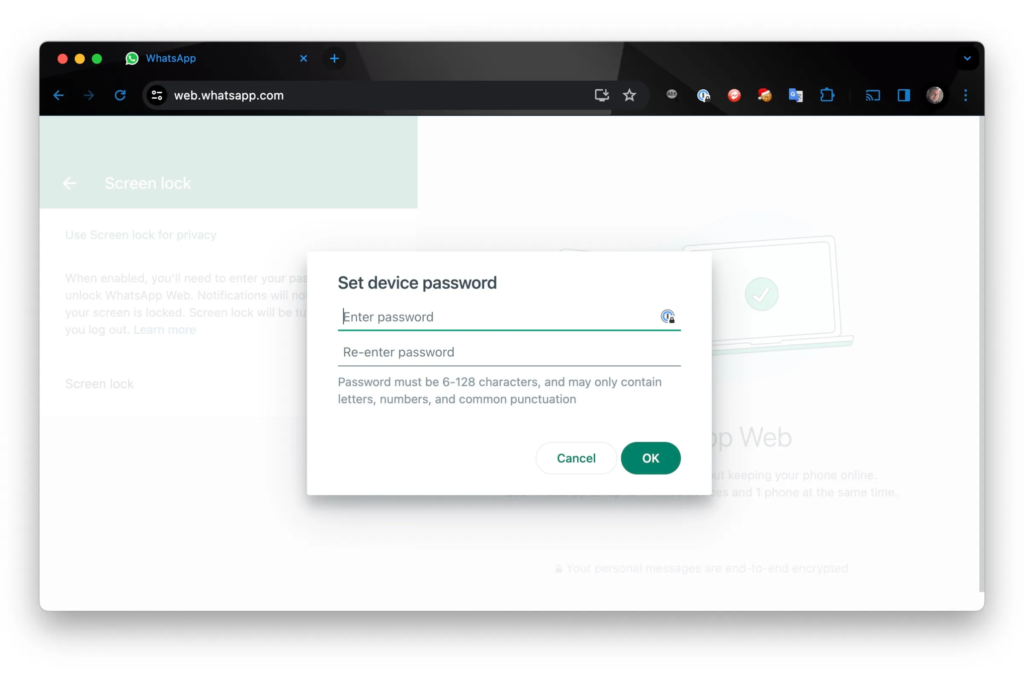
Securing WhatsApp Web is important because it mirrors messages from your mobile device, making it a potential target of unauthorized access and data breaches. It contains sensitive personal and professional communications which, if compromised, could lead to breach of privacy and misuse of information. Implementing security measures for WhatsApp Web ensures that your conversations remain private and protected from potential cyber threats, thereby maintaining the integrity and credibility of your digital interactions.
Setting Up a Password for WhatsApp Web
Setting a password for WhatsApp Web, although not a native feature, can be achieved using two-factor authentication and third-party browser extensions or security apps. These tools add an extra layer of security by requiring a password to access WhatsApp Web, thus keeping your messages and personal information safe from unauthorized access on shared or public computers.
Regularly Monitoring WhatsApp Web Sessions
Regularly monitoring your WhatsApp Web sessions is an important security practice. This involves checking which devices are currently accessing your WhatsApp account through the web interface. This process helps identify and disconnect any unauthorized or suspicious sessions that may pose a threat to your privacy and data security. By keeping a vigilant eye on active sessions, you can take immediate action if you notice access from an unknown device, protecting your personal information and conversations from potential misuse or breach.
What to do if someone accesses your WhatsApp?
If you suspect unauthorized access to your WhatsApp account, immediately log out of all active WhatsApp Web sessions, change your account password, and enable two-factor authentication for additional security. It is also advisable to inform contacts about a possible breach and be wary of suspicious messages or requests.
Educating Yourself on Digital Security
Educating yourself on digital security includes staying informed about the latest cybersecurity threats and best practices. This includes understanding how to keep personal information safe online, using strong passwords, enabling two-factor authentication, recognizing phishing attempts, and safely navigating digital platforms. This continuous learning process is important to protect against cyber risks.
Future Updates and Enhancements to WhatsApp Web Security
Future updates to WhatsApp Web Security are likely to emphasize advanced encryption, advanced two-factor authentication, and AI-powered threat detection. These improvements aim to strengthen user privacy and data security, adapt to emerging cybersecurity challenges, and ensure a safer, more secure online communications experience.
Conclusion
Password-protecting WhatsApp Web is an essential step in protecting your digital communications. With the right tools and practices, you can ensure that your conversations remain private and secure.
Screen sharing has become an essential tool in our digital toolkit, especially in apps like WhatsApp. Whether it’s for work, guiding someone through an app, or sharing content, knowing how to share your phone screen on WhatsApp can enhance your communication experience.
What is WhatsApp Screen Sharing?
Image Source: cellularnews.com
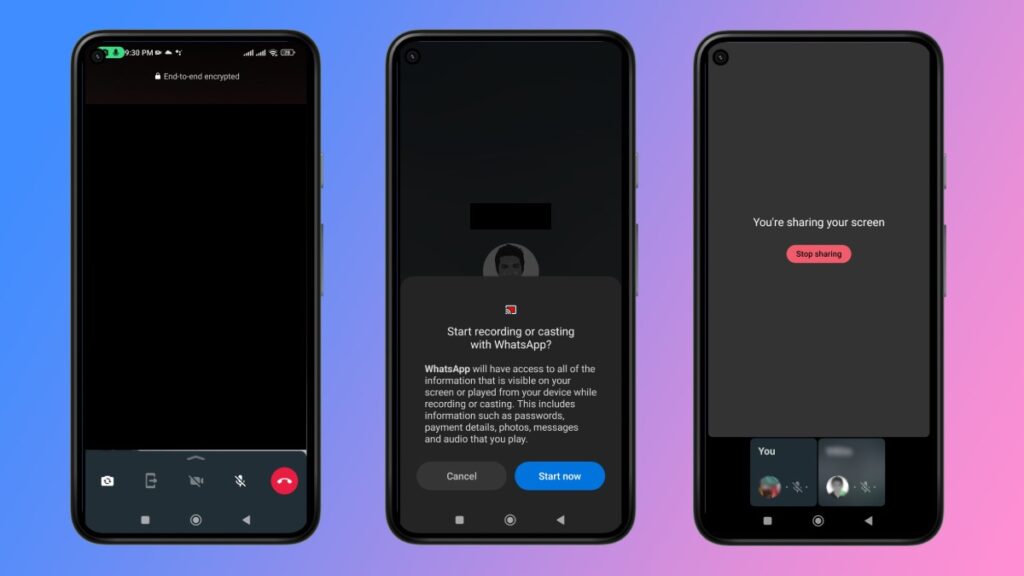
WhatsApp screen sharing is a feature that allows users to share the content of their phone’s screen in real-time during a voice or video call on the WhatsApp platform. It enables users to display apps, photos, documents, or any other content on their screen to the person they are communicating with, enhancing interaction and collaboration during WhatsApp calls.
Rumors have Surfaced After Musk’s Takeover
Screen sharing has become an essential tool in our digital toolkit, especially in apps like WhatsApp. Whether it’s for work, guiding someone through an app, or sharing content, knowing how to share your phone screen on WhatsApp can enhance your communication experience.
Step-by-Step Guide to Screen Sharing on WhatsApp
Sharing your screen on WhatsApp is a straightforward process that enhances your communication experience. Here’s a step-by-step guide on how to use the screen sharing feature on WhatsApp:
Update WhatsApp:
Make sure you have the latest version of WhatsApp.
Start a WhatsApp Call:
Open WhatsApp and go to the contact or group you want to share your screen with.
Start a voice or video call by tapping the call icon.
Activate Screen Sharing:
Once the call is connected, look for the screen-sharing icon. This icon usually looks like a monitor or a rectangular shape with an arrow.
Tap the screen sharing icon.
Grant Permission:
When you use this feature for the first time, WhatsApp may request permission to record your screen. Grant the necessary permissions.
Begin Sharing:
After granting permission, your phone screen will be visible to the person on the other end of the call.
Navigate through your phone as needed. The viewer will see everything displayed on your screen.
Stop Sharing:
To stop screen sharing, simply tap the screen sharing icon again or end the call.
Some versions of WhatsApp may show a stop button on your screen during sharing.
Ending the Call:
Once you’re finished sharing the screen, you can continue your call or end it by tapping the End Call button.
Remember, when you’re sharing your screen, everything that appears on your screen, including notifications, will be visible to the person on the other end. Make sure any sensitive or private information is hidden or notifications are turned off to maintain your privacy.
If you encounter issues like screen lag or disconnection, this section provides solutions to ensure smooth screen sharing.
Conclusion
Screen sharing on WhatsApp is a versatile and user-friendly feature that can enhance your communication and collaboration. By following these guidelines, you can get the most out of this functionality.