Your Tech Story

how to

How to Save Your TikTok Videos Without Watermark Before the Ban

How to Save Your TikTok Videos Without Watermark Before the Ban

With growing concerns about data privacy and ongoing discussions over a possible ban on TikTok in different countries, many users are looking for ways to save their favorite TikTok videos. Whether you are a content creator who is worried about losing access to their work or a user who enjoys watching and sharing videos, knowing how to download TikTok videos without a watermark can be extremely useful.

Why Remove the Watermark?

How to Save Your TikTok Videos Without Watermark Before the Ban

Image Source: youtube.com

Removing watermarks from TikTok videos can be important for a few reasons. First, it gives the video a cleaner look, which is important if you’re reusing content for other platforms. Secondly, it helps maintain a more professional appearance when using videos for presentations or portfolios.

Using Third-Party Apps

Several third-party apps allow you to download TikTok videos without the watermark. Here are a few popular ones:

1. SnapTik

  • How to Use: Simply copy the URL of the TikTok video you wish to download and paste it into SnapTik. The app will process the video and provide a download link without the watermark.

  • Availability: Available as a web service and as an app for both Android and iOS.

2. MusicallyDown

  • How to Use: Similar to SnapTik, you copy the video URL from TikTok and paste it into MusicallyDown. The site will then offer a link to download the video sans watermark.

  • Availability: Accessible through its website.

3. TikTok Video Downloader

  • How to Use: Use this tool by entering the URL of the video into their website. It provides options to download with or without watermarks.

  • Availability: Primarily available online via their website.

Desktop Solutions

For those who prefer using a desktop, there are software solutions that can bulk download TikTok videos without watermarks:

1. 4K Video Downloader

  • How to Use: After installing the software, paste the TikTok video link into the application. Select the quality and format of your download, and make sure to select the option to remove the watermark.

  • Benefits: Allows downloading playlists and supports multiple formats.

2. YT Saver

  • How to Use: This software also works by pasting the video URL. YT Saver offers an option to download TikTok videos without the watermark and even convert them to different formats.

  • Benefits: Supports video conversion to formats like MP4, MP3, and more.

Precautions and Legal Considerations

While it is technically possible to download TikTok videos without watermarks, it is necessary to consider the legal and ethical implications. Always make sure you have the rights to download and use the content, especially if you plan to reuse it for commercial use. Additionally, be cautious when downloading third-party apps and software to avoid malware.

Conclusion

Downloading TikTok videos without watermarks is a useful skill to have, especially in view of the potential restrictions. Whether using web-based tools, apps, or desktop software, there are plenty of options available that suit different needs and preferences. Just remember to download and use content responsibly, respect the rights of the creators, and follow legal guidelines.

How to Configure a VPN on Your Android

How to Configure a VPN on Your Android

How to Configure a VPN on Your Android

Image Source: clario.com

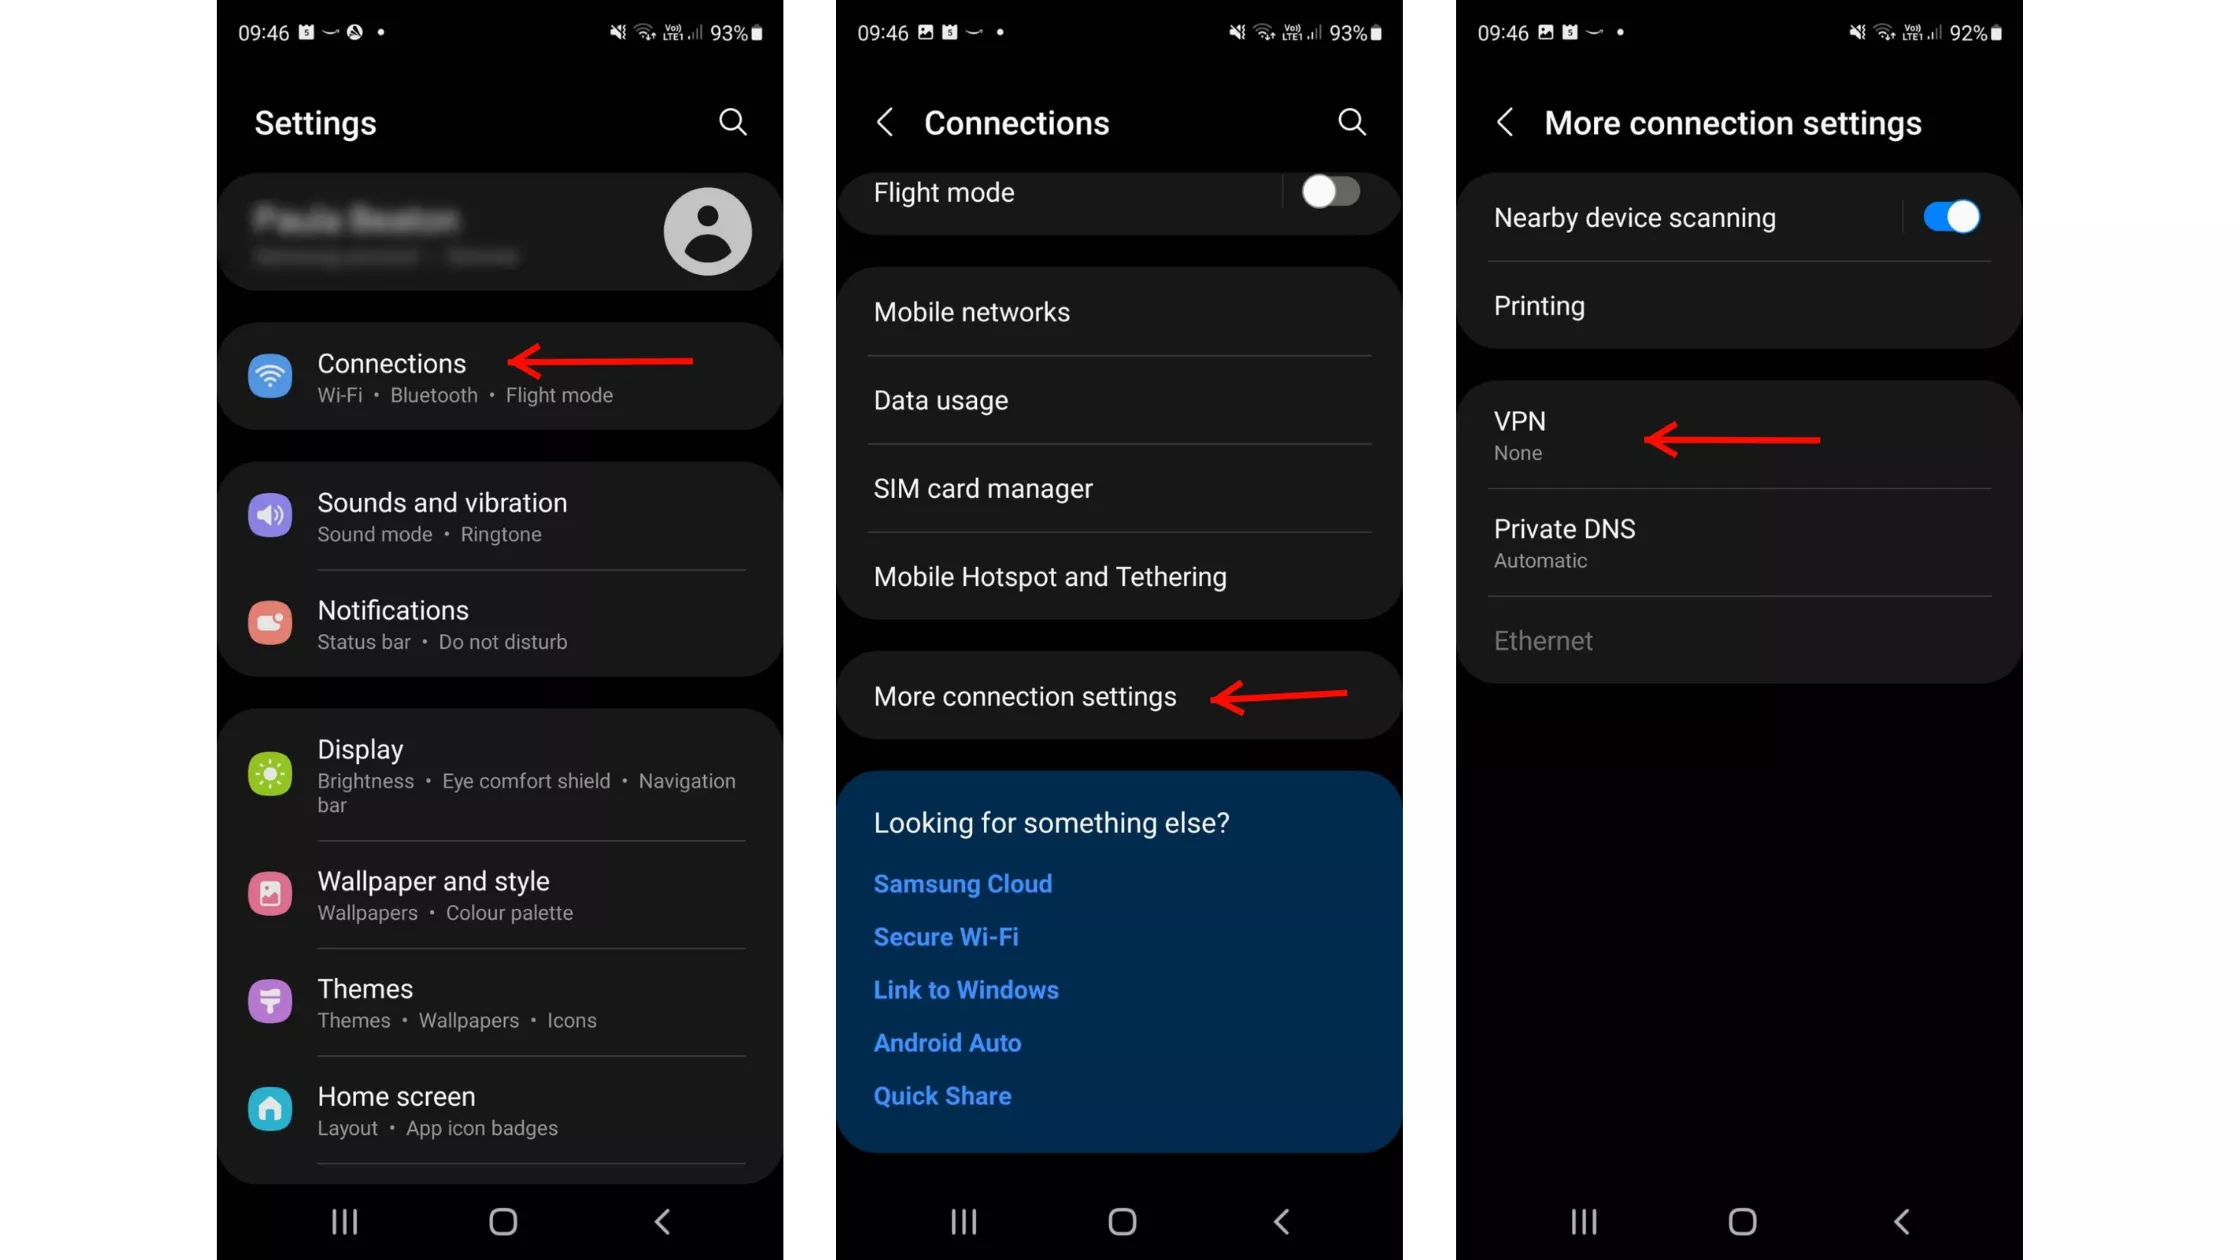
Setting up a VPN (Virtual Private Network) on your Android device can help shield your online activity from prying eyes in the modern digital world when security and privacy are crucial. Here’s a thorough tutorial on setting up a VPN on your Android device, regardless of your reasons for wanting to protect your privacy, access content that is blocked, or secure your connection when using public Wi-Fi.

Selecting a Trustworthy VPN

Choosing a reputable VPN service is essential before beginning the setup procedure. Even while there are many free VPNs out online, they frequently have restrictions and privacy issues. Here are a few well-liked VPN suggestions for Android:

  • NordVPN: Well-known for its extensive server network, quick connections, and strong security features.

  • ExpressVPN: Strong encryption, good speed, and easy-to-use applications are all features of ExpressVPN.

  • Surfshark: An inexpensive VPN with a tonne of features and limitless simultaneous connections.

How to Configure an Android VPN

On an Android smartphone, setting up a VPN is simple and may be done in a few different ways, depending on your preferences.

Installing a VPN App

  • Set up a VPN application: Get a VPN app from the Google Play Store, such as Surfshark, NordVPN, or ExpressVPN.

  • To log in, open the VPN app and enter your login details.

  • Choose a Server: Select a server location via the VPN application.

  • Link: To create a secure VPN connection, tap the “Connect” button.

Manual Setup (Integrated VPN)

  • Get to the Android Settings: Your Android device’s Settings app should open.

  • Go to the Network & Internet page: Select “Network & Internet” from the menu. 

  • Choose a VPN: Select “VPN” from the network settings menu.

  • Create a VPN Profile: To create a new VPN profile, tap the “+” symbol.

  • Enter your VPN information here: Enter the necessary VPN server information that your VPN provider has sent you.

  • Save Profile: Conserve the VPN profile configuration.

Configuring an OpenVPN

  • Get OpenVPN Connect by downloading it: OpenVPN Connect may be installed via the Google Play Store.

  • Configuration for Import: OpenVPN Connect should import the VPN configuration file that your VPN provider sent you.

  • Connect to Server: To create a VPN connection, click “Connect” in the OpenVPN Connect app.

Setting a VPN connection on an Android device

Connecting to a VPN on your Android smartphone is simple after it has been configured:

  • Get VPN Settings Access: Go into the settings on your Android smartphone.

  • Open the VPN: Navigate to “Network & Internet” > “VPN.”

  • Include a VPN profile: Input your VPN credentials by tapping “Add VPN Profile”.

  • Save Preferences: To save the VPN profile, click “Save”.

  • You can establish a direct connection to the VPN profile from the VPN settings menu if it has already been configured.

Removing Yourself from an Android VPN

To unplug your Android smartphone from a VPN:

  • Get VPN Settings Access: Navigate to “VPN” under “Network & Internet” in your device settings.

  • To disable a VPN, either flip the switch to “Off” or choose “Disconnect” from the menu next to the VPN profile.

  • Modifying the VPN Settings on an Android Device

You May Personalise the VPN Experience to your Tastes by Adjusting the VPN Settings on your Android Device:

  • Always On VPN: To maintain an active VPN connection at all times, enable “Always On”.

  • Clear alerts: While the VPN is operational, turn off the persistent alerts.

  • Establish a work profile to provide safe access to private networks.

Why a VPN Is Necessary for Android

On your Android smartphone, using a VPN has the following advantages:

  • Enhanced Privacy: Hides your IP address and online activity by encrypting your internet traffic.

  • Secure Public Wi-Fi: Prevents possible hackers from accessing your data on public Wi-Fi networks.

  • Access to Restricted Content: Get around geo-restrictions and internet censorship to access content from around the world.

  • VoIP Call Security: Provides safe Voice over Internet Protocol (VoIP) connections.

  • Streaming and torrenting: Provides access to geo-blocked streaming material and secure torrenting.

To sum up, installing a VPN on your Android phone is a simple procedure that improves your internet security, accessibility, and privacy. You may use your Android device to browse the internet more safely and securely by selecting a reliable VPN service and adhering to these setup guidelines.

 
A Quick Guide to Cancelling Your Spotify Premium Subscription

A Quick Guide to Cancelling Your Spotify Premium Subscription

A Quick Guide to Cancelling Your Spotify Premium Subscription

Image Source: youtube.com

Are you considering canceling your Spotify Premium subscription? Whether you want to cut costs, switch to another service, or just don’t use it enough to justify the expense, canceling Spotify Premium is straightforward.

1. Via the Spotify Website

Cancelling your subscription through the Spotify website is perhaps the easiest way. Just follow these steps:

Step-by-Step Instructions:

  1. Log In: Visit the Spotify website and log into your account. You’ll need your username and password. If you usually log in through Facebook or Apple, use those credentials.

  2. Account Overview: Once logged in, navigate to your account page by clicking on your profile name in the top right corner, then select ‘Account’ from the dropdown menu.

  3. Subscription Details: In your account page, click on ‘Subscription’ in the sidebar. Here you’ll see your current subscription status and details.

  4. Change or Cancel: Click on ‘Change or Cancel’ to view your options. Select ‘Cancel Premium.’

  5. Confirm Cancellation: Spotify will likely try to persuade you to stay with various offers. If you’re sure about cancelling, continue and confirm your cancellation.

After these steps, your account will revert to Spotify Free at the end of your current billing cycle.

2. Using the Spotify App

While you can’t cancel directly through the Spotify app on your mobile device, you can use it to access the necessary web page where you can complete the cancellation.

Steps to Navigate:

  1. Open the App: Launch the Spotify app on your mobile device.

  2. Account Settings: Go to ‘Your Library’, tap on the settings gear in the top right corner, and then select ‘Account’.

  3. Subscription Page: This will redirect you to the Spotify subscription page in your web browser, where you can follow the same steps as listed above for the website to cancel your subscription.

3. Contacting Customer Support

If you encounter any issues or prefer not to navigate the cancellation process yourself, Spotify’s customer support is available to assist.

How to Reach Out:

  1. Customer Support Page: Go to the Spotify website, scroll to the bottom and click on ‘About’ where you will find ‘Contact Us.’

  2. Choose Your Issue: Follow the prompts to specify your issue – in this case, ‘Subscription’. You will then be directed to choose how you’d like to get help, either through email, live chat, or a community forum.

  3. Request Cancellation: Once in contact with a representative, request that your subscription be cancelled. They may ask for confirmation details such as your account information.

Things to Keep in Mind

  • Refunds: Spotify does not typically issue refunds for unused time unless there was an issue with billing. Check their refund policy for specifics.

  • Reactivation: If you decide to return to Spotify Premium, reactivating your subscription is just as easy as cancelling it.

  • Saved Music: Remember, once you revert to Spotify Free, you will lose access to premium features such as offline listening and ad-free music, but your playlists and saved music will remain intact.

Conclusion

Canceling your Spotify Premium subscription is easy if you follow the right steps. Whether you choose to navigate to their website, use the app to redirect you, or talk directly to customer support, Spotify has made the process as user-friendly as possible. Make sure you understand the terms and conditions of returning to a free account and make the decision that best suits your listening needs and budget.

Step-by-Step Guide: Connecting Your Apple Vision Pro to a Mac

A Quick and Easy Guide to Setting Up Your Apple Vision Pro with a Mac

Step-by-Step Guide: Connecting Your Apple Vision Pro to a Mac

Image Source: digit.in

The distinction between the physical and digital realms is blurred with Apple’s Vision Pro headset, providing an immersive experience. By connecting this cutting-edge device to your MacBook or Mac, you may greatly improve its usefulness and completely change the way you interact digitally and work. Combining the Vision Pro with your Mac brings up a world of possibilities, whether your goal is to increase efficiency or explore cutting-edge apps. This comprehensive how-to guide will walk you through the process of connecting your Apple Vision Pro headset to your Mac and integrating macOS apps into the immersive Vision Pro experience.

Prerequisites for Pre-Connection

Prior to beginning the pairing procedure, make sure your Mac or MacBook and your Apple Vision Pro headset fulfil the following requirements for smooth synchronisation and integration:

  1. Same Apple ID: Verify that the same Apple ID is being used to log onto both devices. In order to enable seamless communication and synchronisation between the Vision Pro and your Mac, this step is essential.

  2. Mac OS compatible: Verify that macOS Sonoma or a later operating system version is installed on your computer. The enhanced features and functions of the Vision Pro are optimally supported thanks to this compatibility. 

  3. Updated Software: Most recent software Update the operating system on your Apple Vision Pro headset to the most recent version. Updating the software on a device is crucial for making use of all of its features and receiving the newest improvements.

  4. Proximity: Throughout the pairing procedure, keep both devices at a fair distance from one another—ideally, no more than ten metres. For the Vision Pro and your Mac to have a steady and dependable wireless connection, proximity is essential.

  5. Bluetooth and Wi-Fi: Turn on Bluetooth and Wi-Fi on your Mac and the Apple Vision Pro headset. For the devices to connect with each other seamlessly and to establish communication, certain wireless technologies are necessary.

You may link the Apple Vision Pro headset with your Mac or MacBook with confidence if certain pre-connection conditions are satisfied. This will enable a seamless and effective integration of the headset.

Connection Guide:

Method 1: Instructions for Setting Up a Connection Using Apple Vision Pro

  • Put on the Vision Pro: To use Apple Vision Pro, put on your headset.

  • Establish Connection: Point your screen’s direction towards your Mac’s screen and find the ‘Connect’ button.

  • Verification: Press the ‘Connect’ button to start the Vision Pro and Mac pairing process.

Method 2: Establishing a Connection using the Control Centre (Mac Virtual Display)

  • Centre for Access Control: With your Apple Vision Pro, open Control Centre by looking up and clicking the drop-down symbol (✇) to see more options.

  • Click on Mac Virtual Display. To enable connection, find and choose the ‘Mac Virtual Display’ option from the Control Centre menu. 

  • Select Your Mac: It will show you a list of devices that are available, including your Mac. Choose your Mac from the list in order to connect.

  • Verification: Verify the connection to complete the pairing procedure and start using the Vision Pro as a Mac virtual display.

Additional Instructions

  • Discontinuing Device Connection: Just press the ‘X’ button in the Control Centre on your Vision Pro headset to unplug the device from your Mac.

  • Resizing Virtual Display: Using pinch and drag actions, you may change the size of the Vision Pro’s virtual display window to fit your needs.

Advantages of Linking Mac with Apple Vision Pro

A number of advantages become available when you connect your Apple Vision Pro to your Mac, including:

  • Expanded Workspace: To improve productivity and multitasking on your Mac, use the Vision Pro as a virtual display.

  • Smooth Integration: For better user experiences, smoothly incorporate macOS apps into the immersive Vision Pro headset environment.

  • Enhanced Control: Use the Vision Pro interface’s simple movements and controls to navigate and interact with Mac programmes.

By connecting the Apple Vision Pro to your Mac or MacBook, you can take your digital interactions to new levels. The device is the epitome of augmented reality technology. A smooth connection between your Mac and Vision Pro headset may be made by following these easy steps, opening up a world of creative possibilities and immersive experiences.

Top 5 Ways to Turn Off Safe Mode on Your Samsung Phone (2024)

Top 5 Ways to Turn Off Safe Mode on Your Samsung Phone (2024)

Top 5 Ways to Turn Off Safe Mode on Your Samsung Phone (2024)

Image Source: softwaretestinghelp.com

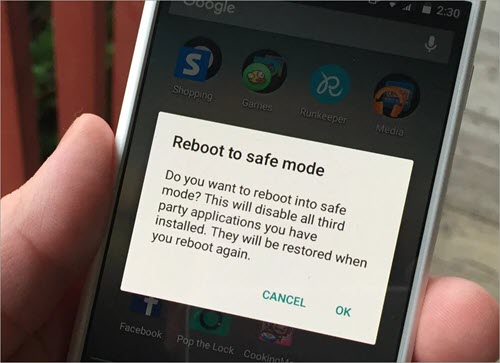
Safe Mode is a diagnostic tool integrated into many smartphones, including Samsung devices. This allows you to boot your phone with only essential system apps running, helping you identify if a third-party app is causing problems like crashes, battery drain, or slow performance. However, once you complete your diagnosis or if you accidentally enter Safe Mode, you need to know how to get out of it.

Step 1: Restart Your Phone

The simplest way to exit safe mode is to restart your device. This method resolves the issue most of the time:

  • Press and hold the power button on your Samsung phone until the power option comes up.

  • Tap on ‘Restart’ or ‘Reboot’ in the power menu.

  • Let the device turn off and then turn it back on. Verify if it starts normally, not in safe mode.

Step 2: Use the Notifications Panel

Samsung phones often provide a quick toggle to exit safe mode directly from the notifications panel:

  • You can simply swipe down from the top of your screen to open the notification panel.

  • Look for a notification that says ‘Safe mode is on’ or similar.

  • Tap on this notification, and you will usually see an option to ‘Turn off Safe mode’. Tap it, and your phone will restart in normal mode.

Step 3: Check the Volume Buttons

Sometimes, safe mode is activated because of an issue with the volume buttons. If your phone continues to boot in safe mode after a restart, inspect the volume down button:

  • Make sure the Volume Down button is not stuck or jammed. If it is, try gently wiggling it to free it up.

  • Once the button is free, restart your phone again to see if it boots normally.

Step 4: Uninstall Problematic Apps

If your Samsung phone still boots into safe mode after trying the above steps, a recently installed app might be causing the issue:

  • While in safe mode, navigate to Settings > Apps.

  • Scroll through the list of installed apps and look for any that you downloaded shortly before the problem started.

  • Tap on the suspicious app, then select ‘Uninstall’ to remove it from your device.

  • Restart your phone to see if it now boots normally.

Step 5: Factory Reset

If all other methods fail, it may be necessary to perform a factory reset as a last resort. This will erase all data from your device, so ensure you back up your files first:

  • Navigate to Settings, select General Management, then Reset, and choose Factory Data Reset.

  • Review the information on the screen, back up your data, and then tap ‘Reset’.

  • Proceed by following the on-screen instructions to finalize the reset process.

Conclusion

Exiting safe mode on Samsung phones usually involves simple steps like restarting or tapping a notification. However, persistent problems may require more thorough troubleshooting such as checking for faulty buttons or uninstalling apps. If all else fails, a factory reset should be your last course of action. Remember, the steps above may vary slightly depending on your Samsung model and software version, but they provide a general guide for 2024 models.

Quick Fixes for Epson Printer Offline Error on Mac and iPhone

Quick Fixes for Epson Printer Offline Error on Mac and iPhone

Encountering printer offline error can be quite frustrating especially when you need to print documents urgently. If you are using an Epson printer with a Mac or iPhone and encounter this issue, don’t worry. There are several troubleshooting steps you can follow to resolve this issue and get your printer back online.

Understanding the Printer Offline Error

Quick Fixes for Epson Printer Offline Error on Mac and iPhone

Image Source: epsonprintersupportpro.us

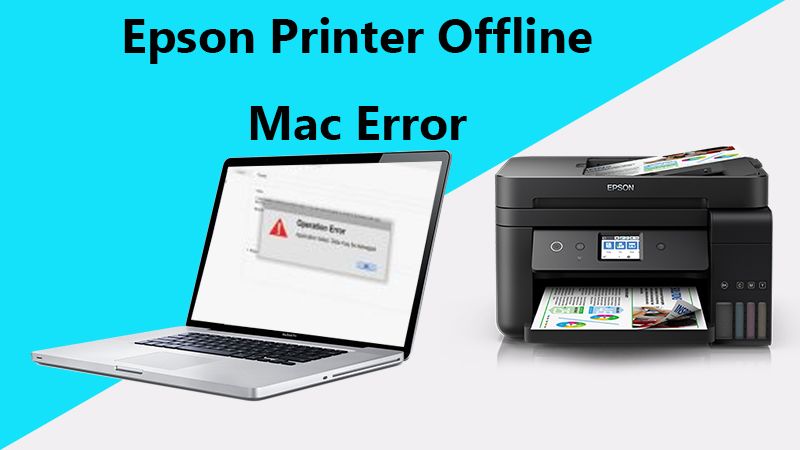
The “Offline” printer status indicates that your computer or iPhone cannot communicate with the printer. This problem can arise due to various reasons, such as connectivity issues, outdated printer drivers, or incorrect printer settings. Identifying the source of the cause is the first step toward fixing the problem.

Initial Checks

Before proceeding with more complex solutions, perform these basic checks:

  • Ensure the Printer is Turned On: It might seem obvious, but sometimes the printer might be off or in sleep mode.

  • Check the Connection: Make sure your Epson printer is properly connected to your Mac or iPhone, whether through Wi-Fi or a cable.

Fixing Epson Printer Offline Error on Mac

  • Check Printer Queue: Open ‘System Preferences’ > ‘Printers & Scanners’. Select your printer and open the queue. If there are any stalled print jobs, remove them.

  • Delete and Re-Add Printer: Sometimes, removing the printer from your list and adding it back can resolve the issue. Go to ‘Printers & Scanners’, select your printer, click the ‘-‘ button to remove it, then click the ‘+’ button to add it back.

  • Update Printer Drivers: Ensure your printer’s drivers are up to date. You can download the latest drivers from Epson’s official website.

Fixing Epson Printer Offline Error on iPhone

  • Restart Your Printer and iPhone: A simple restart can often fix connectivity issues. Turn off your printer and iPhone, wait a few minutes, and then turn them back on.

  • Check Wi-Fi Connection: Ensure both your iPhone and printer are connected to the same Wi-Fi network.

  • Use AirPrint: Make sure you’re using AirPrint, Apple’s printing technology. Go to the document or photo you want to print, tap the share icon, and select ‘Print’. Ensure your Epson printer is selected.

Advanced Troubleshooting Steps

If the issue persists, consider these advanced steps:

  • Reset Printing System: On your Mac, right-click the printer list in ‘Printers & Scanners’ and select ‘Reset printing system’. This will remove all printers and scanners and their jobs. Re-add your printer.

  • Firmware Update: Check for any firmware updates for your Epson printer on the Epson support site.

Conclusion

Dealing with the printer offline error can be a hassle, but with these troubleshooting steps, you will be able to get your Epson printer back online on both Mac and iPhone. Many such issues can be prevented with regular maintenance. If you are experiencing persistent issues, it is recommended to contact Epson support for further assistance.

Remember, the key to a smooth printing experience is to ensure that your equipment communicates effectively with your printer. By following the steps outlined above, you are on your way to hassle-free printing.

FAQs

  1. Why does my printer keep going offline?

    • This can be due to connectivity issues, power-saving modes, or problems with your printer’s settings or drivers.

  2. Can outdated drivers cause offline printer errors?

    • Yes, outdated or corrupt drivers can prevent your computer or iPhone from communicating with your printer, causing it to appear offline.

  3. How do I know if my printer is AirPrint-enabled?

    • Check your printer’s specifications on the Epson website or look for the AirPrint logo on your printer or its box.

  4. What should I do if none of these steps work?

    • Contact Epson support for professional assistance. There might be a hardware issue or a more complex software problem.

  5. How can I prevent going offline in the future?

    • Regularly update your printer’s drivers and firmware, ensure stable connectivity, and check the printer’s settings for any issues that might cause it to go offline.