Your Tech Story

Tech Tips

How to Create and Join a Channel on WhatsApp?

How to Create and Join a Channel on WhatsApp?

Meta, the parent company of WhatsApp, is constantly working on enhancing the user experience by introducing new features and updates. One of the latest additions to the WhatsApp platform is Channels. WhatsApp Channels offer an exciting new way for individuals and organizations to share updates and information with their followers. In this article, we’ll walk you through how to create and join a channel on WhatsApp.

What Is a WhatsApp Channel?

A WhatsApp Channel is a platform for people to receive the latest information and updates from individuals or organizations they follow. This could include news portals, sports teams, politicians, or even businesses and brands. WhatsApp Channels enable one-way communication, allowing administrators to broadcast updates and share information with their followers using text, media (photos, videos, stickers), and even conduct polls to gather feedback.
How to Create and Join a Channel on WhatsApp?

Image Source: livemint.com

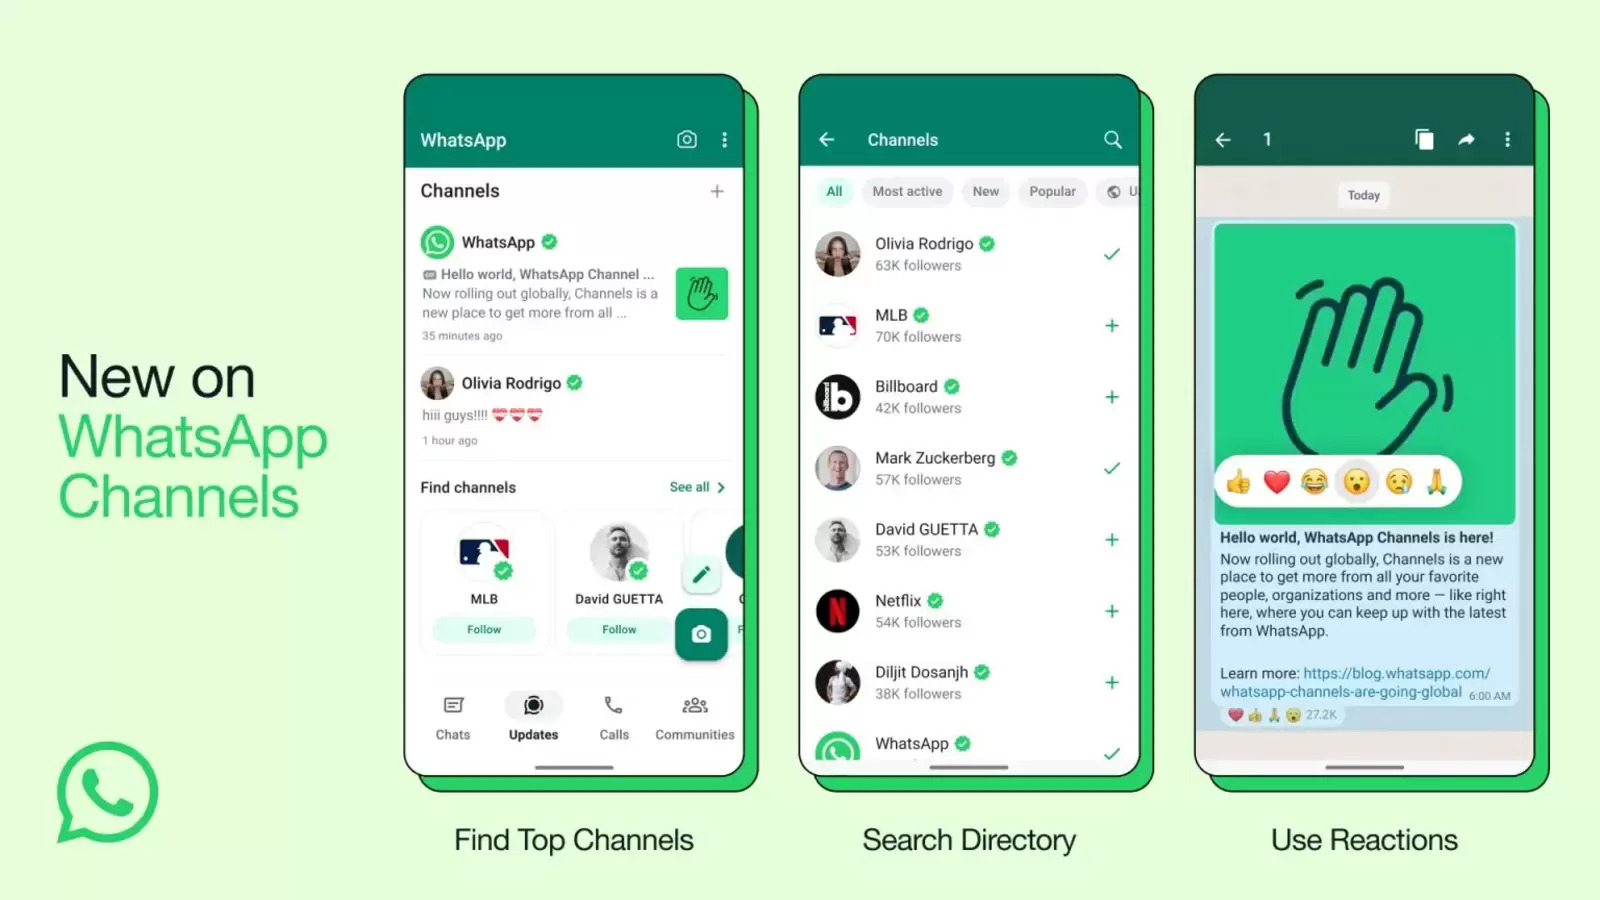
Privacy is a key aspect of WhatsApp Channels. When you join a Channel, your phone number remains hidden from the admin and other followers, and likewise, the admin’s phone number is not visible to Channel members. These Channels are accessible via the Updates tab, which was previously known as Status. According to Meta, Channel updates are stored on their servers for up to 30 days.

Getting Channels on WhatsApp

To access the Channels feature, you need to make sure you have the latest version of WhatsApp. Here’s how to update the app:

  1. If you’re using an Android device, open the Play Store. If you have an iPhone, open the App Store.
  2. Navigate to the Updates section in your respective app store.
  3. If there’s a pending WhatsApp update, install it.

Once you’ve updated WhatsApp, you’ll have access to Channels.

Joining a WhatsApp Channel

After updating WhatsApp, follow these steps to join a WhatsApp Channel:

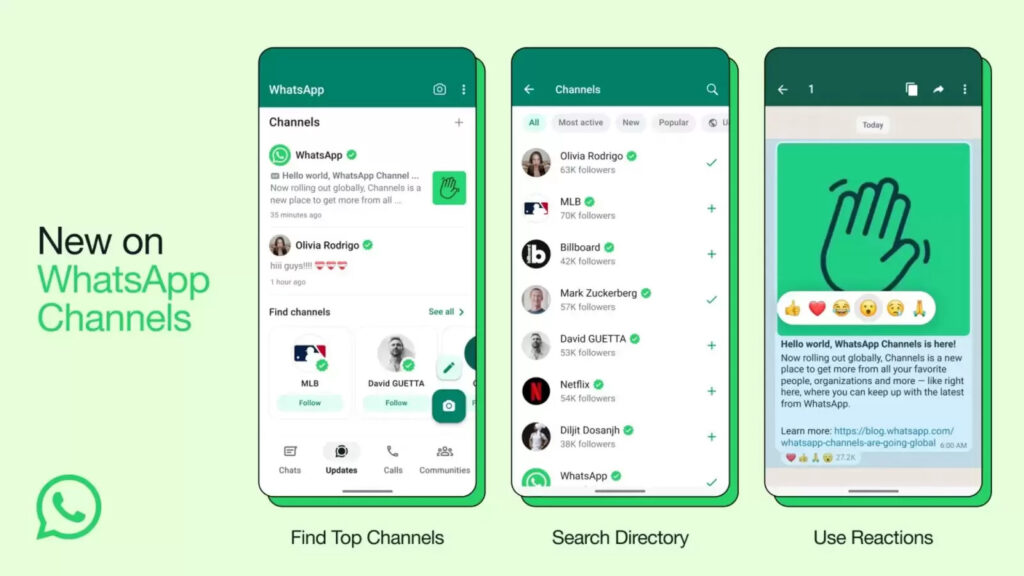
  1. Open WhatsApp and head to the Updates tab.
  2. Below the Status section, you’ll find the Channels section.
  3. Tap the “Find Channels” button to see a list of Channel recommendations.
  4. You can use filters and country settings to customize your search.
  5. Click on a Channel to view the type of content it broadcasts. You can also forward and share the Channel with others from this page.

If you want to follow a Channel, hit the “Follow” button in the top-right corner. Alternatively, you can join a Channel by tapping the plus (+) button next to a Channel name in the suggested list.

By default, notifications from the Channels you join are muted. You can unmute them by clicking the bell icon to the left of the three-dot menu in the top-right corner or by toggling off the switch for “Muted” on the Channel’s page.

Creating a WhatsApp Channel

WhatsApp allows anyone to create their own Channel. If you have a following and want to share important information or updates, follow these steps to create a WhatsApp Channel:

  1. Open WhatsApp and go to the Updates tab.
  2. Tap the plus (+) button next to the Channels section and select “Create channel.”
  3. Click “Continue.”
  4. Provide a name for your Channel and write a description to inform potential followers about its purpose.
  5. Choose a profile icon for your Channel to make it more recognizable.
  6. Finally, click the “Create channel” button to create your Channel.

Once your WhatsApp Channel is created, you can start posting messages and updates. You can also share the link to your Channel with your followers by clicking the “Channel Link” button in the top-right corner and selecting the contacts you want to share it with. Followers can react to your updates using emojis or participate in polls, but they cannot send direct messages to the admin.

Your own Channel, along with the Channels you follow, can be found in the Channels section within the Updates tab. This section serves as a hub for all your Channel-related activities on WhatsApp.

Top 5 Ways to Find Out If Someone Has Remote Access to Your iPhone

How to Find Out If Someone Has Remote Access to Your iPhone

Have you ever felt bad that someone was snooping into your digital life without your permission? It’s like someone is looking over your shoulder, except it’s through your iPhone. Scary, right? Well, let’s not just wallow in paranoia; I’m here to help you find out if someone has gained remote access to your iPhone and what you can do about it. So, let’s dive in!

Signs of Unauthorized Remote Access

Unusual Battery Drain

This could be a clear sign that someone is accessing your device remotely. Remote access apps can be power-hungry creatures, eating up your battery life like there’s no tomorrow.

Strange Phone Call Behavior

If your call has more echoes than a mountain yodel or more noise than a static-filled radio, pay attention. These may be signs that your calls are being intercepted or monitored. It’s as if someone else is joining your call, but they’re definitely not invited.

Unexpected Data Usage Spikes

Top 5 Ways to Find Out If Someone Has Remote Access to Your iPhone

Image Source: gadgetbridge.com

When your data usage exceeds your daily usage, it’s time to check. This could mean that your iPhone is secretly sending data to an uninvited guest.

Unfamiliar Apps or Profiles

Did you suddenly find an app that you don’t remember downloading? These apps could be the tools that someone is using to gain remote access to your iPhone.

How to Check for Remote Access

Analyzing System Services

Search your iPhone’s Settings like you’re on a treasure hunt. Look for any system services you don’t recognize. If you feel something is wrong, it’s time to take action.

Reviewing Installed Apps

Check your apps one by one. If you see something unfamiliar, uninstall it immediately.

Checking Network Activity

Monitor your network activity. If a lot of data is being used in the background, this is also a sign of remote use of the iPhone.

Verifying Configuration Profiles

Configuration profiles are like your phone’s house rules. If you find new or unfamiliar passwords, it is as if someone changed the passwords without telling you.

Preventative Measures

Updating iOS Regularly

Keep your iOS updated. This is one of the best ways to keep your iPhone’s security tight.

Using Strong Passwords

Your passwords should be like a good plot twist – unexpected and surprising. The stronger they are, the more secure your iPhone will be.

Enabling Two-Factor Authentication

Two-factor authentication is like a bouncer for your iPhone. This adds an extra layer of security, making sure it’s you who is trying to get in.

Being Cautious of Public Wi-Fi

Public Wi-Fi is risky. Avoid this when possible, or use a VPN to keep your data secure.

What to Do If You Suspect Remote Access

Changing Your Apple ID Password

If you think someone has remote access, change your Apple ID password faster than a chameleon changes colors. This is the first step towards locking them down.

Updating or Restoring iOS

Sometimes, the best way to clean your iPhone is to start fresh. Updating or restoring your iOS may remove any unwanted guests.

Contacting Apple Support

If you’re feeling overwhelmed, contact Apple Support.

Conclusion

In the digital world, your iPhone is like your digital home. You don’t want strangers snooping around your house, and the same applies to your phone. Stay alert, stay informed, and keep your iPhone locked down more tightly than Fort Knox.

FAQs

How can I tell if my iPhone’s battery is drained due to remote access or just a bad battery?  If your battery health is good, but drains rapidly and unexpectedly, it may be worth checking remote access.

Can updating iOS remove malware or unwanted remote access apps?  Yes, updating iOS can often remove malicious software and patch security flaws.

What’s the first thing I should do if I suspect remote access to my iPhone?  Change your Apple ID password immediately and check for any unfamiliar apps or profiles.

Is it safe to use public Wi-Fi if I have a VPN?  A VPN can provide a secure connection over public Wi-Fi, but it’s still best to be careful with sensitive transactions.

How often should I update my iOS?  Whenever a new update becomes available, the update often includes important security patches.

How to Get More Storage on PC and Laptop (5 Solutions)

How to Get More Storage on PC and Laptop (5 Solutions)

Are you constantly playing the “What Can I Delete Today” game from your PC or Laptop? Well, now is the time to break free from the shackles of storage and give your device the breathing space it deserves. Let’s look at five great solutions to expand your digital horizons and get more storage on your PC or laptop.

The External Hard Drive

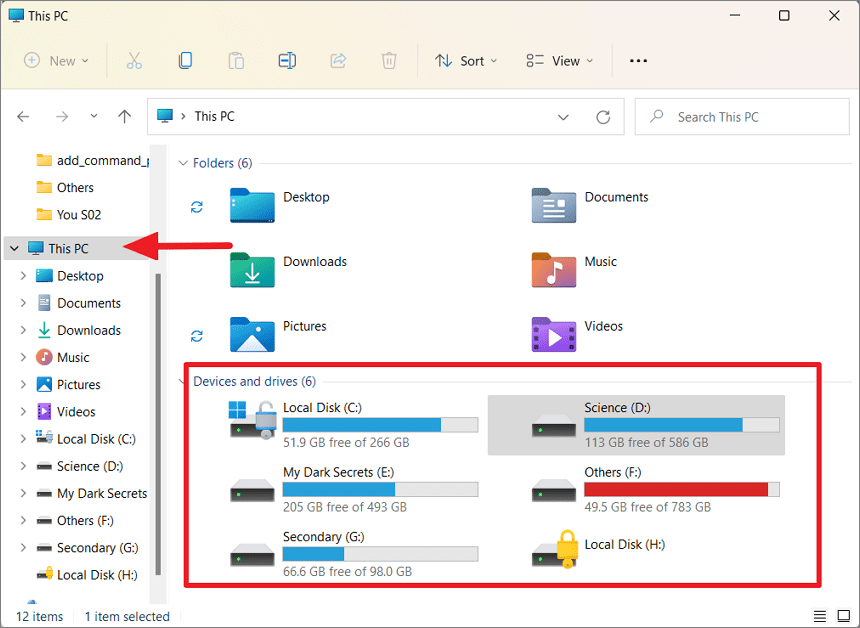
Think of an external hard drive as a backpack for your digital life. It’s portable, comes in a variety of sizes, and can store everything from your vacation photos to that indie game collection you’ve been amassing. Simply plug it into your USB port and expand storage instantly!

Cloud Storage

It’s like an invisible storage locker that follows you everywhere. Services like Google Drive, Dropbox, and OneDrive offer a chunk of free storage, with the option to upgrade if your digital collection is more than a library can accommodate. Bonus? You can access your data from any device with the internet.

Internal Hard Drive or SSD Upgrade

How to Get More Storage on PC and Laptop (5 Solutions)

Image Source: allthings.how

Upgrading your internal hard drive or switching to a solid-state drive (SSD) is like giving your device a heart transplant. It’s a little more complicated than plugging in an external drive, but the performance boost and extra space is like a double shot of espresso for your PC or laptop.

Network-Attached Storage (NAS)

Imagine having your own mini-cloud at home. A NAS device is just like that. It’s a storage hub that connects to your home network, allowing multiple devices to access and store files. It’s like having a digital library at home, without the late fees.

USB Flash Drives

USB flash drives are the key to the digital world. They’re small, portable, and perfect for transferring files or giving your device a little storage pick-me-up. They may not hold your entire movie collection, but they’re perfect for the essential files you need on the go.

Conclusion

Gone are the days of playing digital Tetris with your files. With these five solutions, you can expand your storage and breathe easy, knowing there’s enough room for all your digital treasures. So go ahead, embrace the space, and never let “low storage” warnings hinder your digital style.

FAQs

  • Will using an external hard drive slow down my computer? No way! It’s like having a second closet for your stuff. It does not affect the speed of your main server (your computer).
  • Is cloud storage safe? Safe like a locked treasure chest! Reputable cloud services use encryption and security measures to keep your digital treasures safe.
  • SSD or HDD: Which is better for internal storage? SSDs are like sports cars: fast and smooth. HDDs are like minivans: more space, but not as zippy. If you want speed, get an SSD. If you want more space for your money, HDD is best.
  • Can USB flash drives be used for long-term storage? They can, but they’re best for transferring files or short-term storage.
  • How much storage can a USB drive hold? USB drives come in various storage capacities, ranging from as little as 2GB to as much as 2TB. The most common sizes are 16GB, 32GB, 64GB, 128GB, and 256GB.
  • Can I run programs from a USB drive? Yes, some programs can be run directly from a USB drive without installation on the host computer. These are often known to as “portable” applications.
How to Check, Install, Update, and Uninstall Drivers on Windows

Keep Your Windows Drivers Up-to-Date: How to Check, Install, Update, and Uninstall Drivers on Windows

Drivers are essential software components that allow your operating system (like Windows) to communicate with hardware devices. Whether it’s your printer, graphics card, or keyboard, they all need drivers to function correctly.

Checking Your Drivers:

How to Check, Install, Update, and Uninstall Drivers on Windows

Image Source: alphr.com

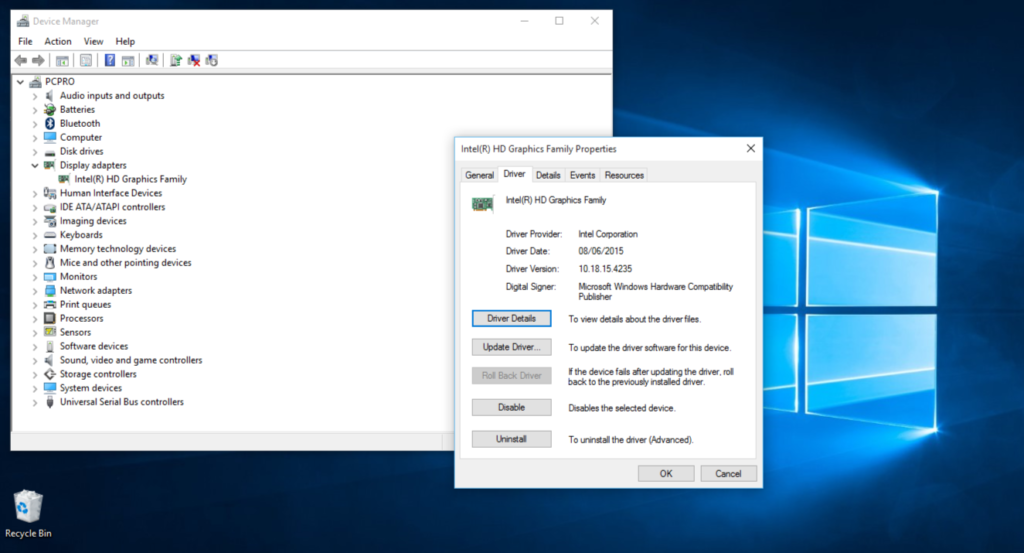
First things first, let’s play detective and check the status of your drivers. You don’t need a magnifying glass for this; just follow these steps:

  • Press the Windows key + X and click on ‘Device Manager’.
  • In Device Manager, you will see a list of devices. Click on any to view driver details.
  • If you see a yellow exclamation mark, Houston, we have a problem. That driver said, “Help, I’m not functioning properly!”

Installing Drivers:

So, you’ve got some new hardware, and it’s time to roll out the drivers. Here’s how to install them:

  • Again, open Device Manager.
  • Right-click on the device that requires a driver and select ‘Update Driver’.
  • Select ‘Search automatically for updated driver software’ and let Windows work its magic.

Updating Drivers:

Just like updating your favorite apps, it’s important to keep your drivers up to date. Here’s information about updating them:

  • Again, open Device Manager.
  • Click on the device and select ‘Update Driver’.
  • This time, select ‘Browse my computer for driver software’ if you downloaded the latest driver manually.
  • Follow the prompts, and you are up to date!

Uninstalling Drivers:

Sometimes, things don’t work out and you have to say goodbye to the driver. Here’s the uninstalling process:

  • Open Device Manager (feeling like a pro yet?).
  • Click on the device and select ‘Update Driver’.
  • Confirm your decision, and it’s done. Don’t worry; It’s not you, it’s them.

Troubleshooting:

Sometimes drivers are unable to function properly. If you’re experiencing issues, try these quick solutions:

  • Revert to a previous driver version if a new update is causing the trouble.
  • Boot into Safe Mode to troubleshoot without any interference.
  • Use System Restore to go back to that happy time when everything was working.

Conclusion:

And there you have it folks! You are now a Driver Wizard, ready to check, install, update, and uninstall drivers like a professional. Remember, keeping your drivers under control is like giving your PC regular health checks – it keeps things running smoothly and prevents future headaches.

FAQs

1. What’s a driver, and why is it so important? A driver is like a translator that helps your operating system and hardware communicate effectively. Without it, they’re speaking different languages!

2. How often should I update my Windows drivers? Generally, if it doesn’t work properly, don’t fix it. But for security and performance, it’s good to check for updates every few months.

3. Can outdated drivers cause problems? Absolutely! They can cause hardware malfunction, security vulnerabilities, and overall system instability.

4. Should I use driver update software? This isn’t necessary, but it can save you time and hassle, especially if you’re not comfortable going into Device Manager.

The Ultimate Guide to Selecting Value-for-Money Noise-Cancelling Earbuds​

In a world where the hustle and bustle of daily life can be overwhelming, noise-cancelling earbuds have become a sanctuary for music lovers and busy professionals alike. But with a plethora of options available, how do you select a pair that offers the best bang for your buck? This comprehensive guide will walk you through the nuances of noise-cancelling technology and what to look for when choosing your perfect pair.

Understanding Noise Cancellation Technology

Before diving into the selection process, it’s crucial to understand the technology behind noise cancellation.

Active vs. Passive Noise Cancellation

Noise-cancelling earbuds come in two Flavors: active and passive. Active noise cancellation (ANC) uses microphones and speakers to create sound waves that counteract ambient noise. Passive noise cancellation, on the other hand, relies on the physical design of the earbuds to block out sound.

How Noise Cancellation Works

ANC earbuds pick up external sounds with built-in microphones. They then produce sound waves that are the exact opposite (anti-phase) of the unwanted noise, effectively cancelling it out. This technology is particularly effective against consistent, low-frequency sounds like the hum of an airplane or the rumble of a train.

Factors to Consider When Choosing Earbuds

With a basic understanding of noise cancellation, let’s delve into the factors that make a pair of earbuds truly value for money.

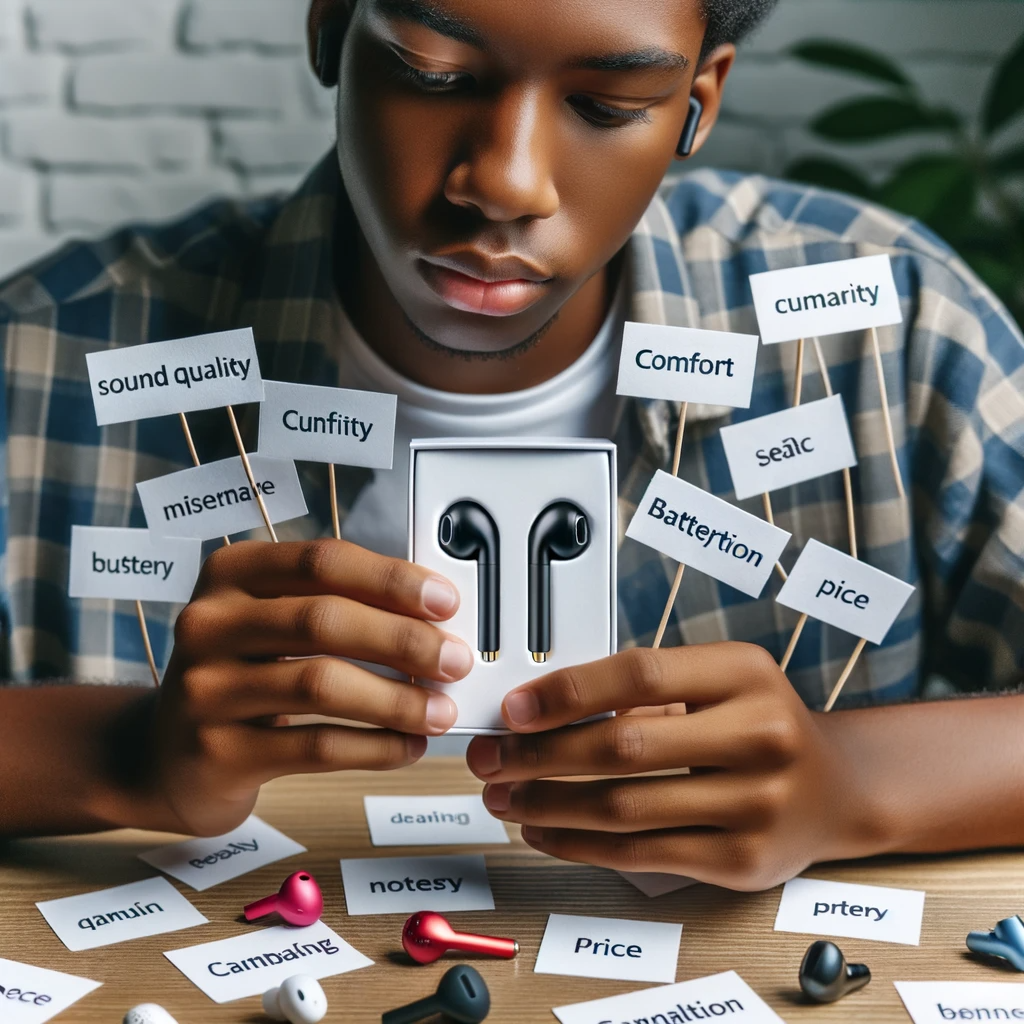
Sound Quality
The primary purpose of earbuds is to deliver sound, so quality is paramount. Look for earbuds with clear highs, rich mids, and deep bass. Reading reviews and testing them out (if possible) can give you a good idea of their audio fidelity.

Battery Life
ANC technology requires power, so battery life is a significant consideration. Ensure that the earbuds you choose can last through your daily activities without frequent recharging.

Comfort and Fit
Comfort is subjective, but it’s essential for long listening sessions. Look for earbuds with multiple ear tip sizes or those made from soft, flexible materials.

Build Quality and Durability
Your earbuds should withstand the rigors of daily use. Durable materials and solid construction are indicators of a pair that will last.

Additional Features

Modern earbuds come with a suite of additional features like touch controls, voice assistants, and customizable sound profiles. While not essential, these can enhance your listening experience.

Top Picks for Value-for-Money Noise-Cancelling Earbuds

Let’s explore some options across different price ranges.

Budget-Friendly Options

You don’t have to break the bank to get decent noise-cancelling earbuds. Brands like  Anker and Taotronics offer affordable options that don’t skimp on quality.

Mid-Range Contenders

For those willing to spend a bit more, brands like One Plus, Jabra and Sony provide a balance between cost and advanced features.

Premium Choices

If you’re looking for the crème de la crème, brands like Apple, Bose and Sennheiser offer top-tier noise cancellation and sound quality, albeit at a higher price point.

Where to Buy Your Earbuds

Once you’ve made your choice, it’s time to purchase. Consider buying from reputable retailers or directly from the manufacturer to ensure authenticity and warranty coverage.

Caring for Your Noise-Cancelling Earbuds

To get the most out of your investment, proper care is essential. Store them in a case when not in use, keep them clean, and avoid exposing them to extreme temperatures.

Conclusion

Selecting the right noise-cancelling earbuds doesn’t have to be daunting. By understanding the technology and considering the factors outlined in this guide, you can find a pair that offers excellent value for money and enhances your audio experience.

FAQs

  1. Can noise-cancelling earbuds completely eliminate all sounds? No, while they significantly reduce ambient noise, they can’t block out everything, especially sudden, high-frequency sounds.
  2. Do noise-cancelling earbuds pose any health risks? There’s no evidence to suggest that noise-cancelling earbuds pose health risks. However, listening at high volumes for extended periods can damage hearing.
  3. How long do noise-cancelling earbuds typically last? With proper care, quality noise-cancelling earbuds can last several years.
  4. Can I use noise-cancelling earbuds without music? Yes, you can use them to reduce ambient noise even when you’re not listening to audio.
  5. Are there noise-cancelling earbuds suitable for exercise? Yes, many brands offer sweat-resistant earbuds designed for physical activity.
HP Printer Won't Connect to Wi-Fi? Here Are Some Troubleshooting Tips

HP Printer Won’t Connect to Wi-Fi? Here Are Some Troubleshooting Tips

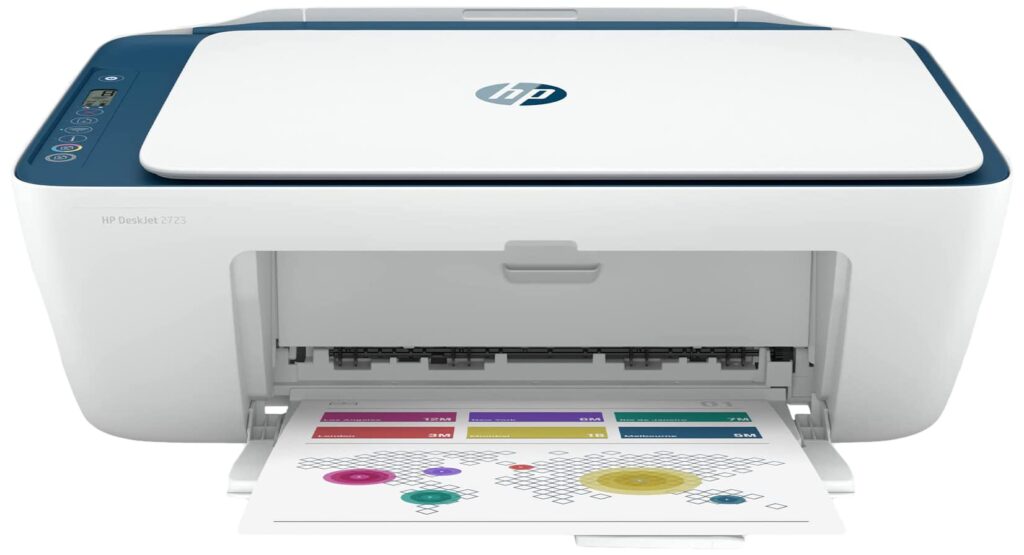
Setting up an HP printer with Wi-Fi usually involves a few steps. These instructions will guide you through the process for most HP printers, although some specific models may have slight variations.

Prerequisites:

HP Printer Won't Connect to Wi-Fi? Here Are Some Troubleshooting Tips

Image Source: amazon.in

  • An HP printer that supports Wi-Fi connectivity.
  • A computer or mobile device with Wi-Fi capability.
  • An active Wi-Fi network.

Steps to set up an HP printer with Wi-Fi:

1. Prepare the Printer:

  • Turn on the HP printer.
  • Ensure it has paper and the ink or toner cartridges are installed.

2. On the Printer’s Control Panel:

  • Navigate to the ‘Setup’ or ‘Network’ menu.
  • Choose ‘Wireless’ or ‘Wi-Fi Setup Wizard.’ This might be under ‘Wireless Settings’ or a similar menu.
  • The printer will start searching for available networks.
  • From the list of networks, select your Wi-Fi network.
  • If prompted, enter the Wi-Fi password using the printer’s control panel.

3. Software Installation (if not already installed):

     Insert the CD that came with the printer into your computer and follow the on-screen instructions. If you don’t have a CD:

  • Go to the HP website.
  • Navigate to ‘Support’ and then ‘Software and Drivers’.
  • Enter your printer model and download the appropriate driver/software package.
  • Install the downloaded software on your computer and follow the on-screen instructions.

4. Connect the Printer to the Computer:

  • During software installation, you will be asked to select a connection type. Select ‘Wireless’.
  • The software will search for the printer on the network.
  • Once found, follow the on-screen instructions to complete the connection.

5. Print a Test Page:

  • Once setup is complete, try printing a test page to make sure the connection is successful.

6. Mobile Devices (optional):

    If you want to print from a mobile device:

  • Download the HP Smart app from your device’s app store.
  • Open the app and follow the instructions to connect the printer.
  • Now you can print directly to your HP printer from your mobile device.

Troubleshooting Tips:

  • If your printer does not detect the Wi-Fi network, make sure the printer is within range of the router.
  • Make sure the Wi-Fi network is active and working for other devices.
  • Restart both the printer and the router if you encounter connection issues.
  • If using a dual-band router (2.4GHz and 5GHz), make sure your printer is connecting to a 2.4GHz network, as many printers may not support the 5GHz band.
  • Always make sure you have installed the latest printer drivers from the HP website.

Following these steps will help you set up your HP printer with Wi-Fi. If you encounter any problems, refer to the specific user manual for your printer model or visit the HP Support website for more assistance.